

Send AWS EC2 Instance logs to CloudWatch.

One of the most important aspects of maintaining an application is resilience and quickly recovering from failover. In order to achieve this, we need to monitor the application and its components. AWS provides a service called CloudWatch which can be used to monitor the application and its components. CloudWatch can be used to monitor the application logs, metrics, and alarms. In this article, we will see how to send the EC2 instance's system logs to CloudWatch.
What is Cloudwatch and why do we need it?
CloudWatch is a monitoring and management service built for AWS cloud resources and the applications you run on AWS. CloudWatch provides you with data and actionable insights to monitor your applications, respond to system-wide performance changes, optimize resource utilization, and get a unified view of operational health. There are many more advantages of using CloudWatch. You can find them here.
So without further ado, let's see how to send the application logs to CloudWatch.
Steps
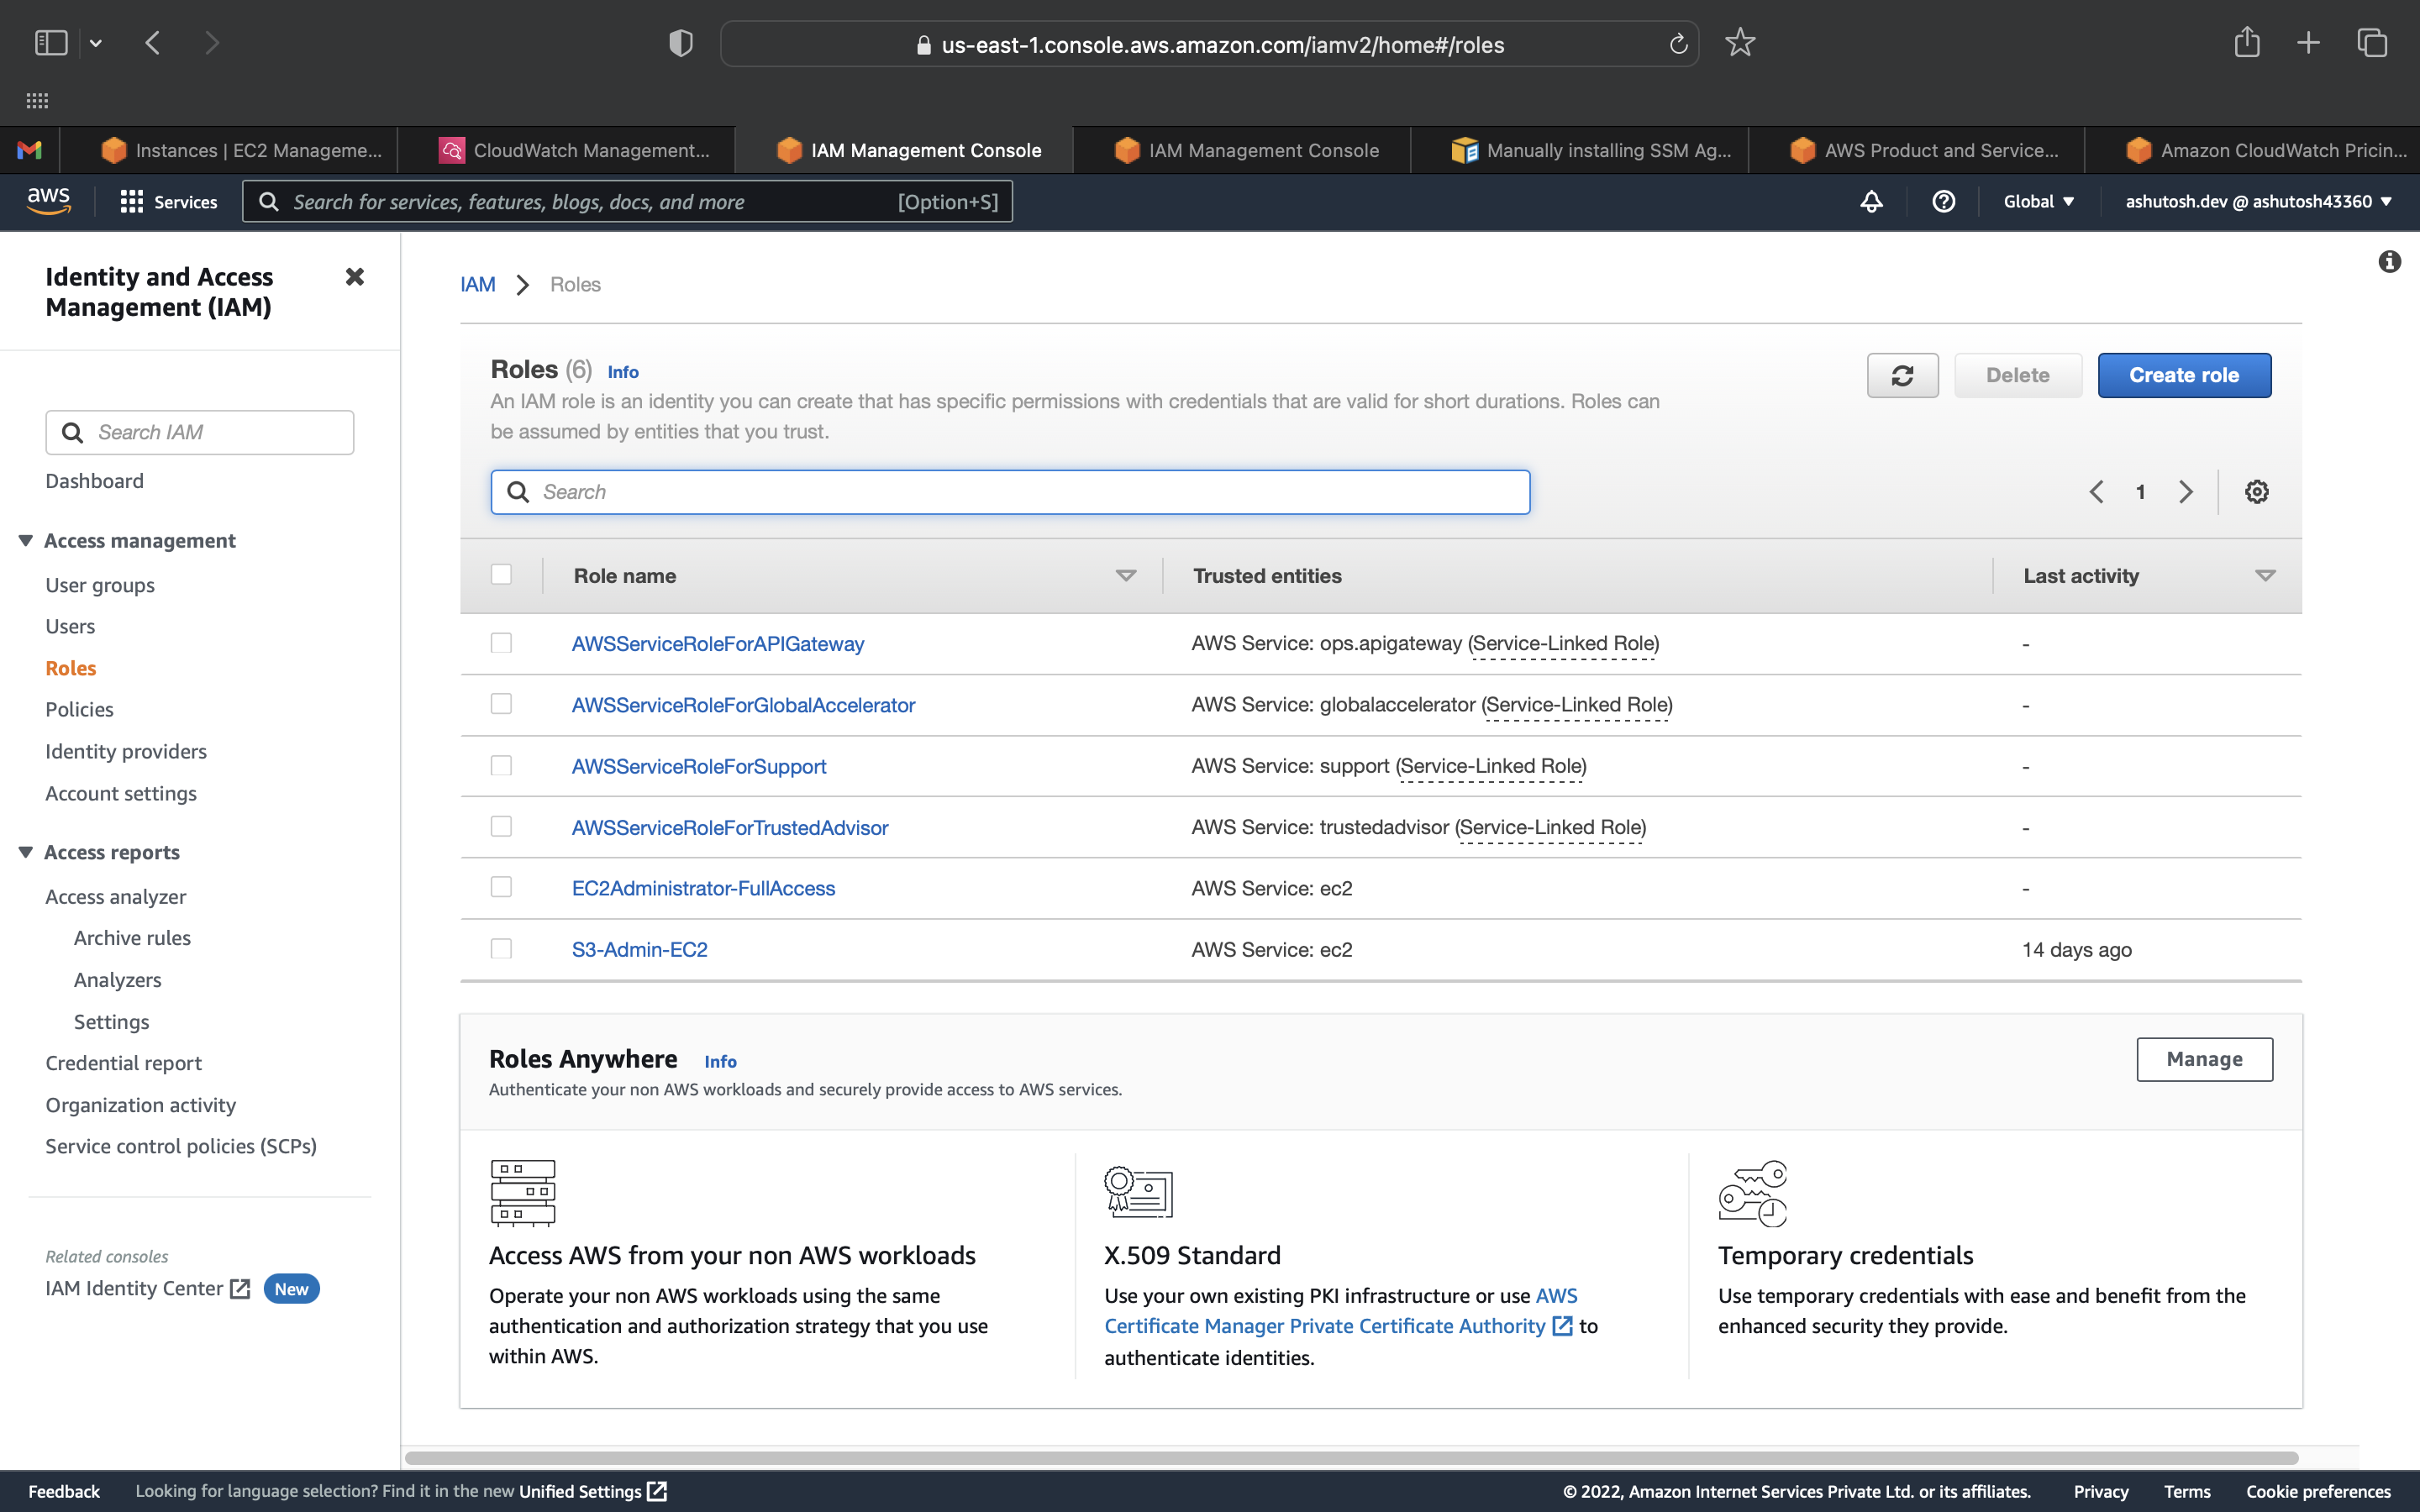
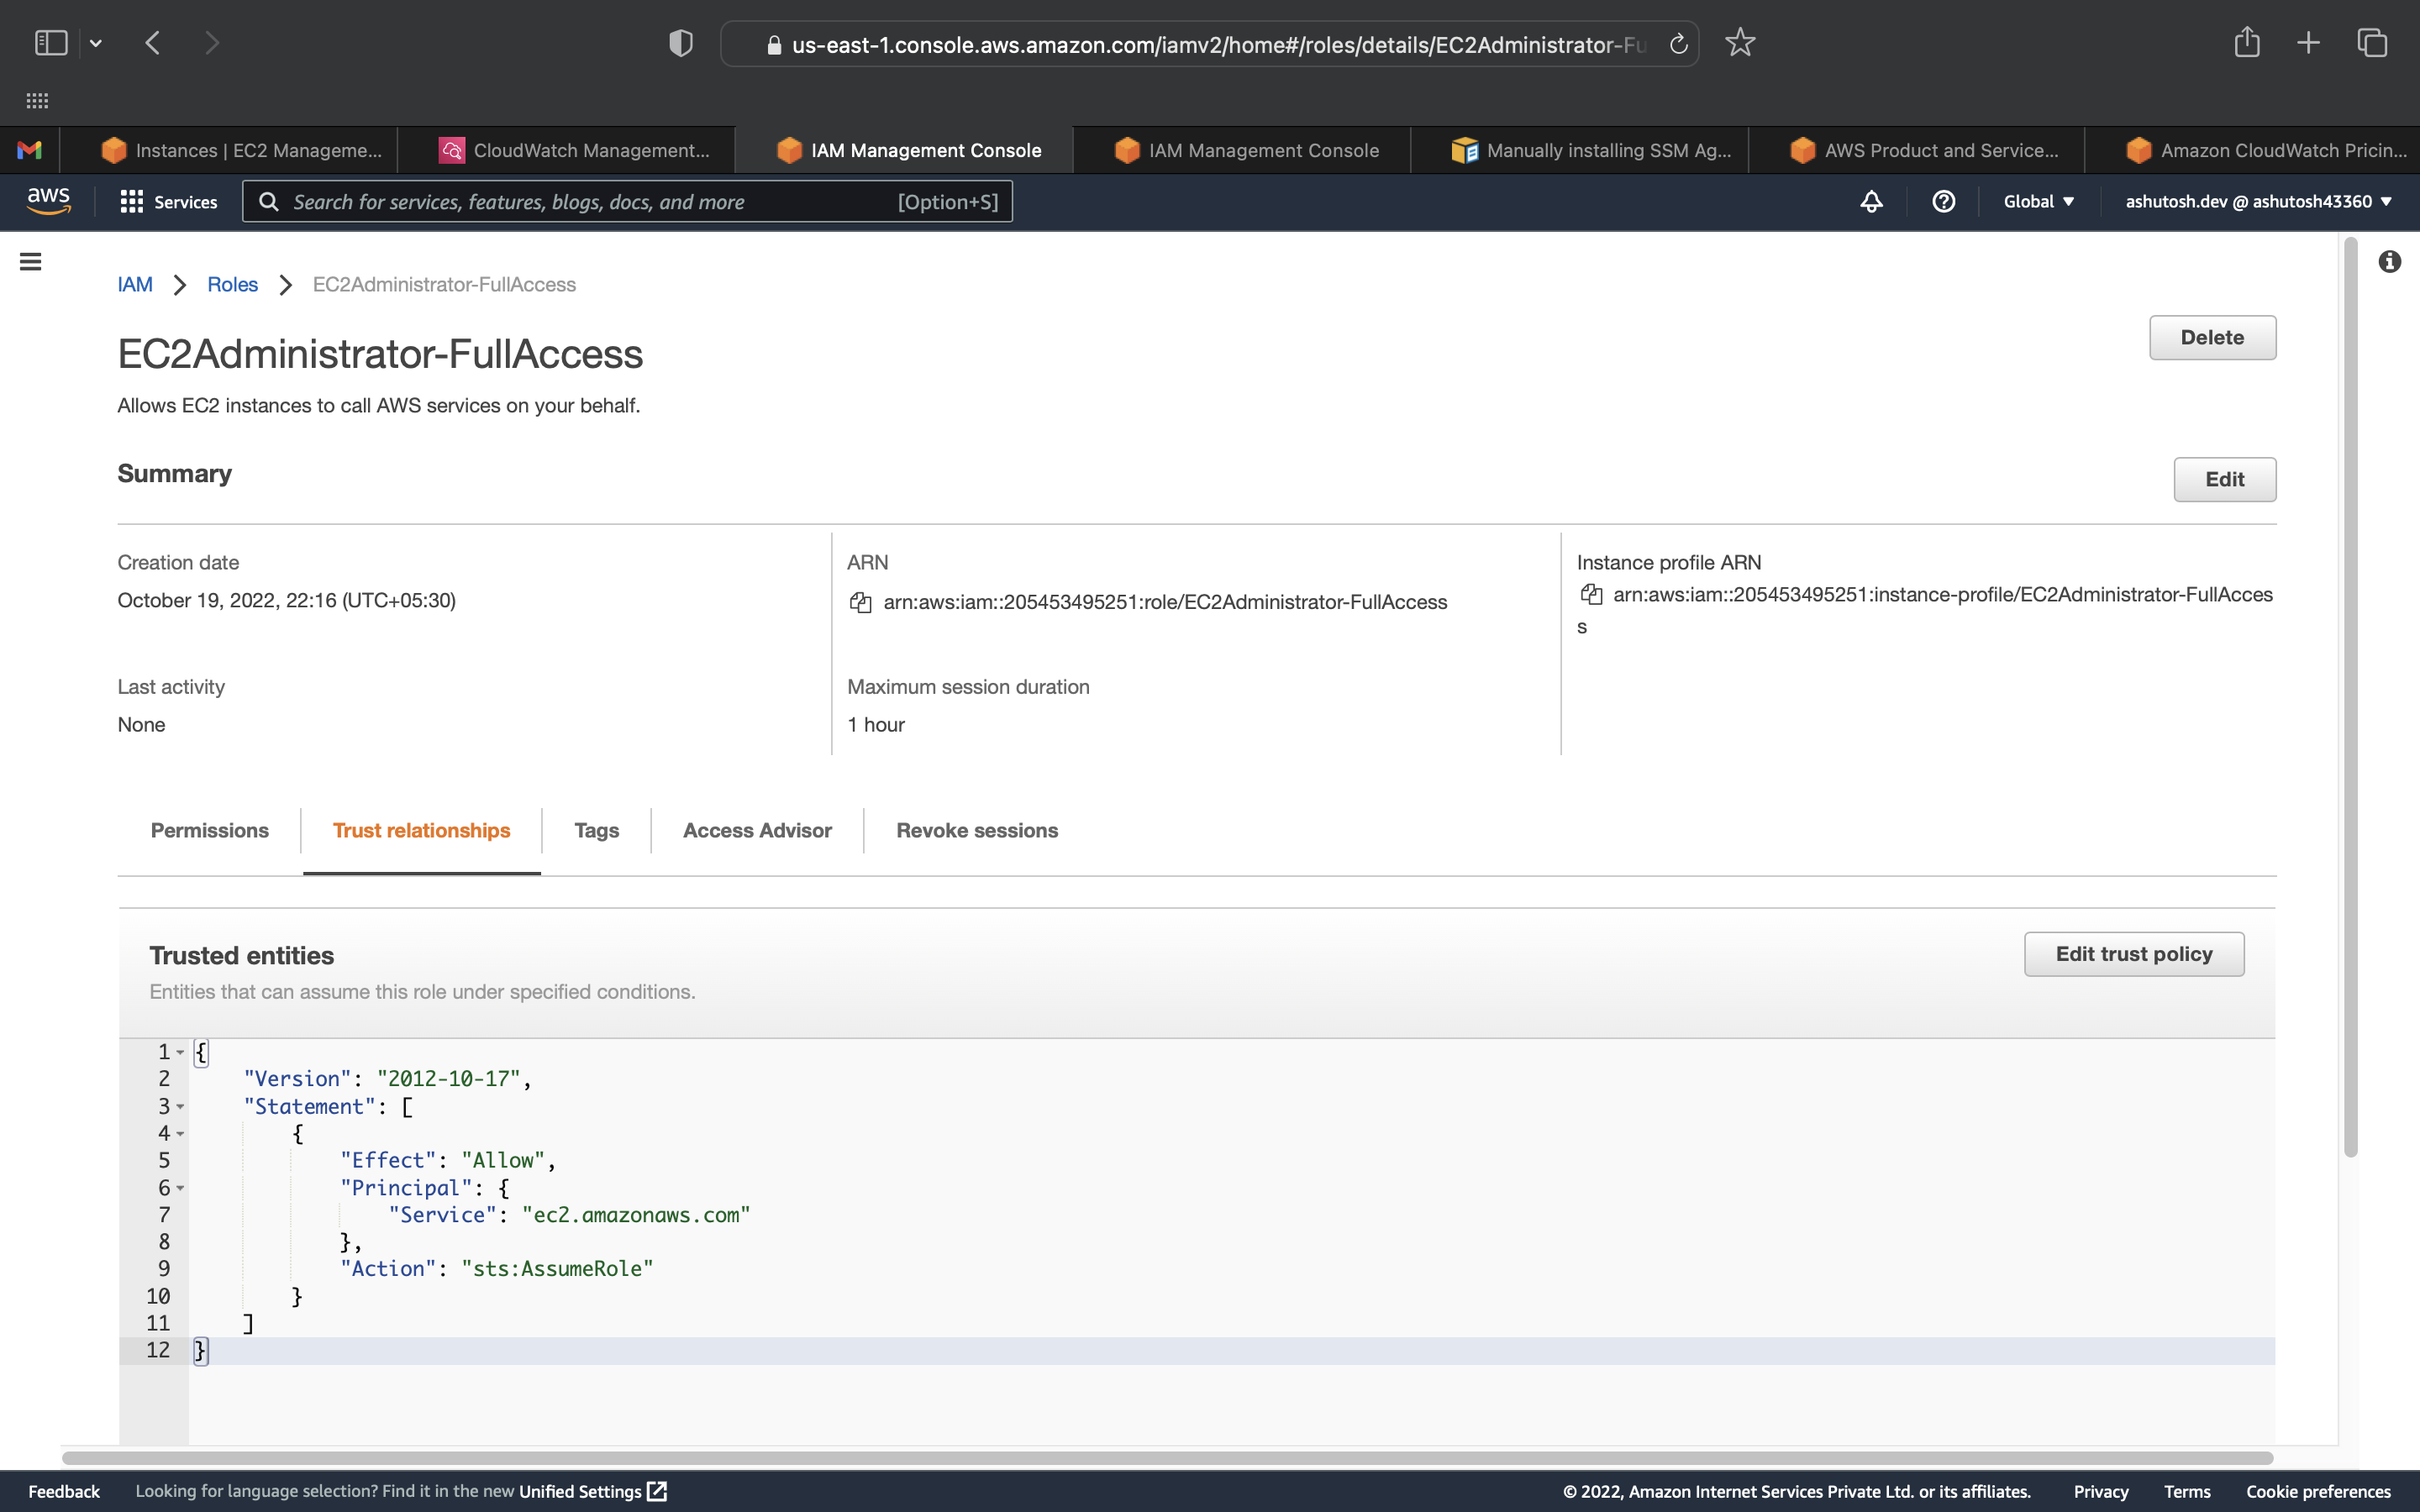
Create IAM Role.
Create IAM Role with relevant permission and attach it to the Linux instance.
Below are the steps to create IAM Role.
Login to the AWS console, and go to the IAM service. Click on Roles in the sidebar and then click on Create Role.
Select EC2 and click on Next to Permissions.
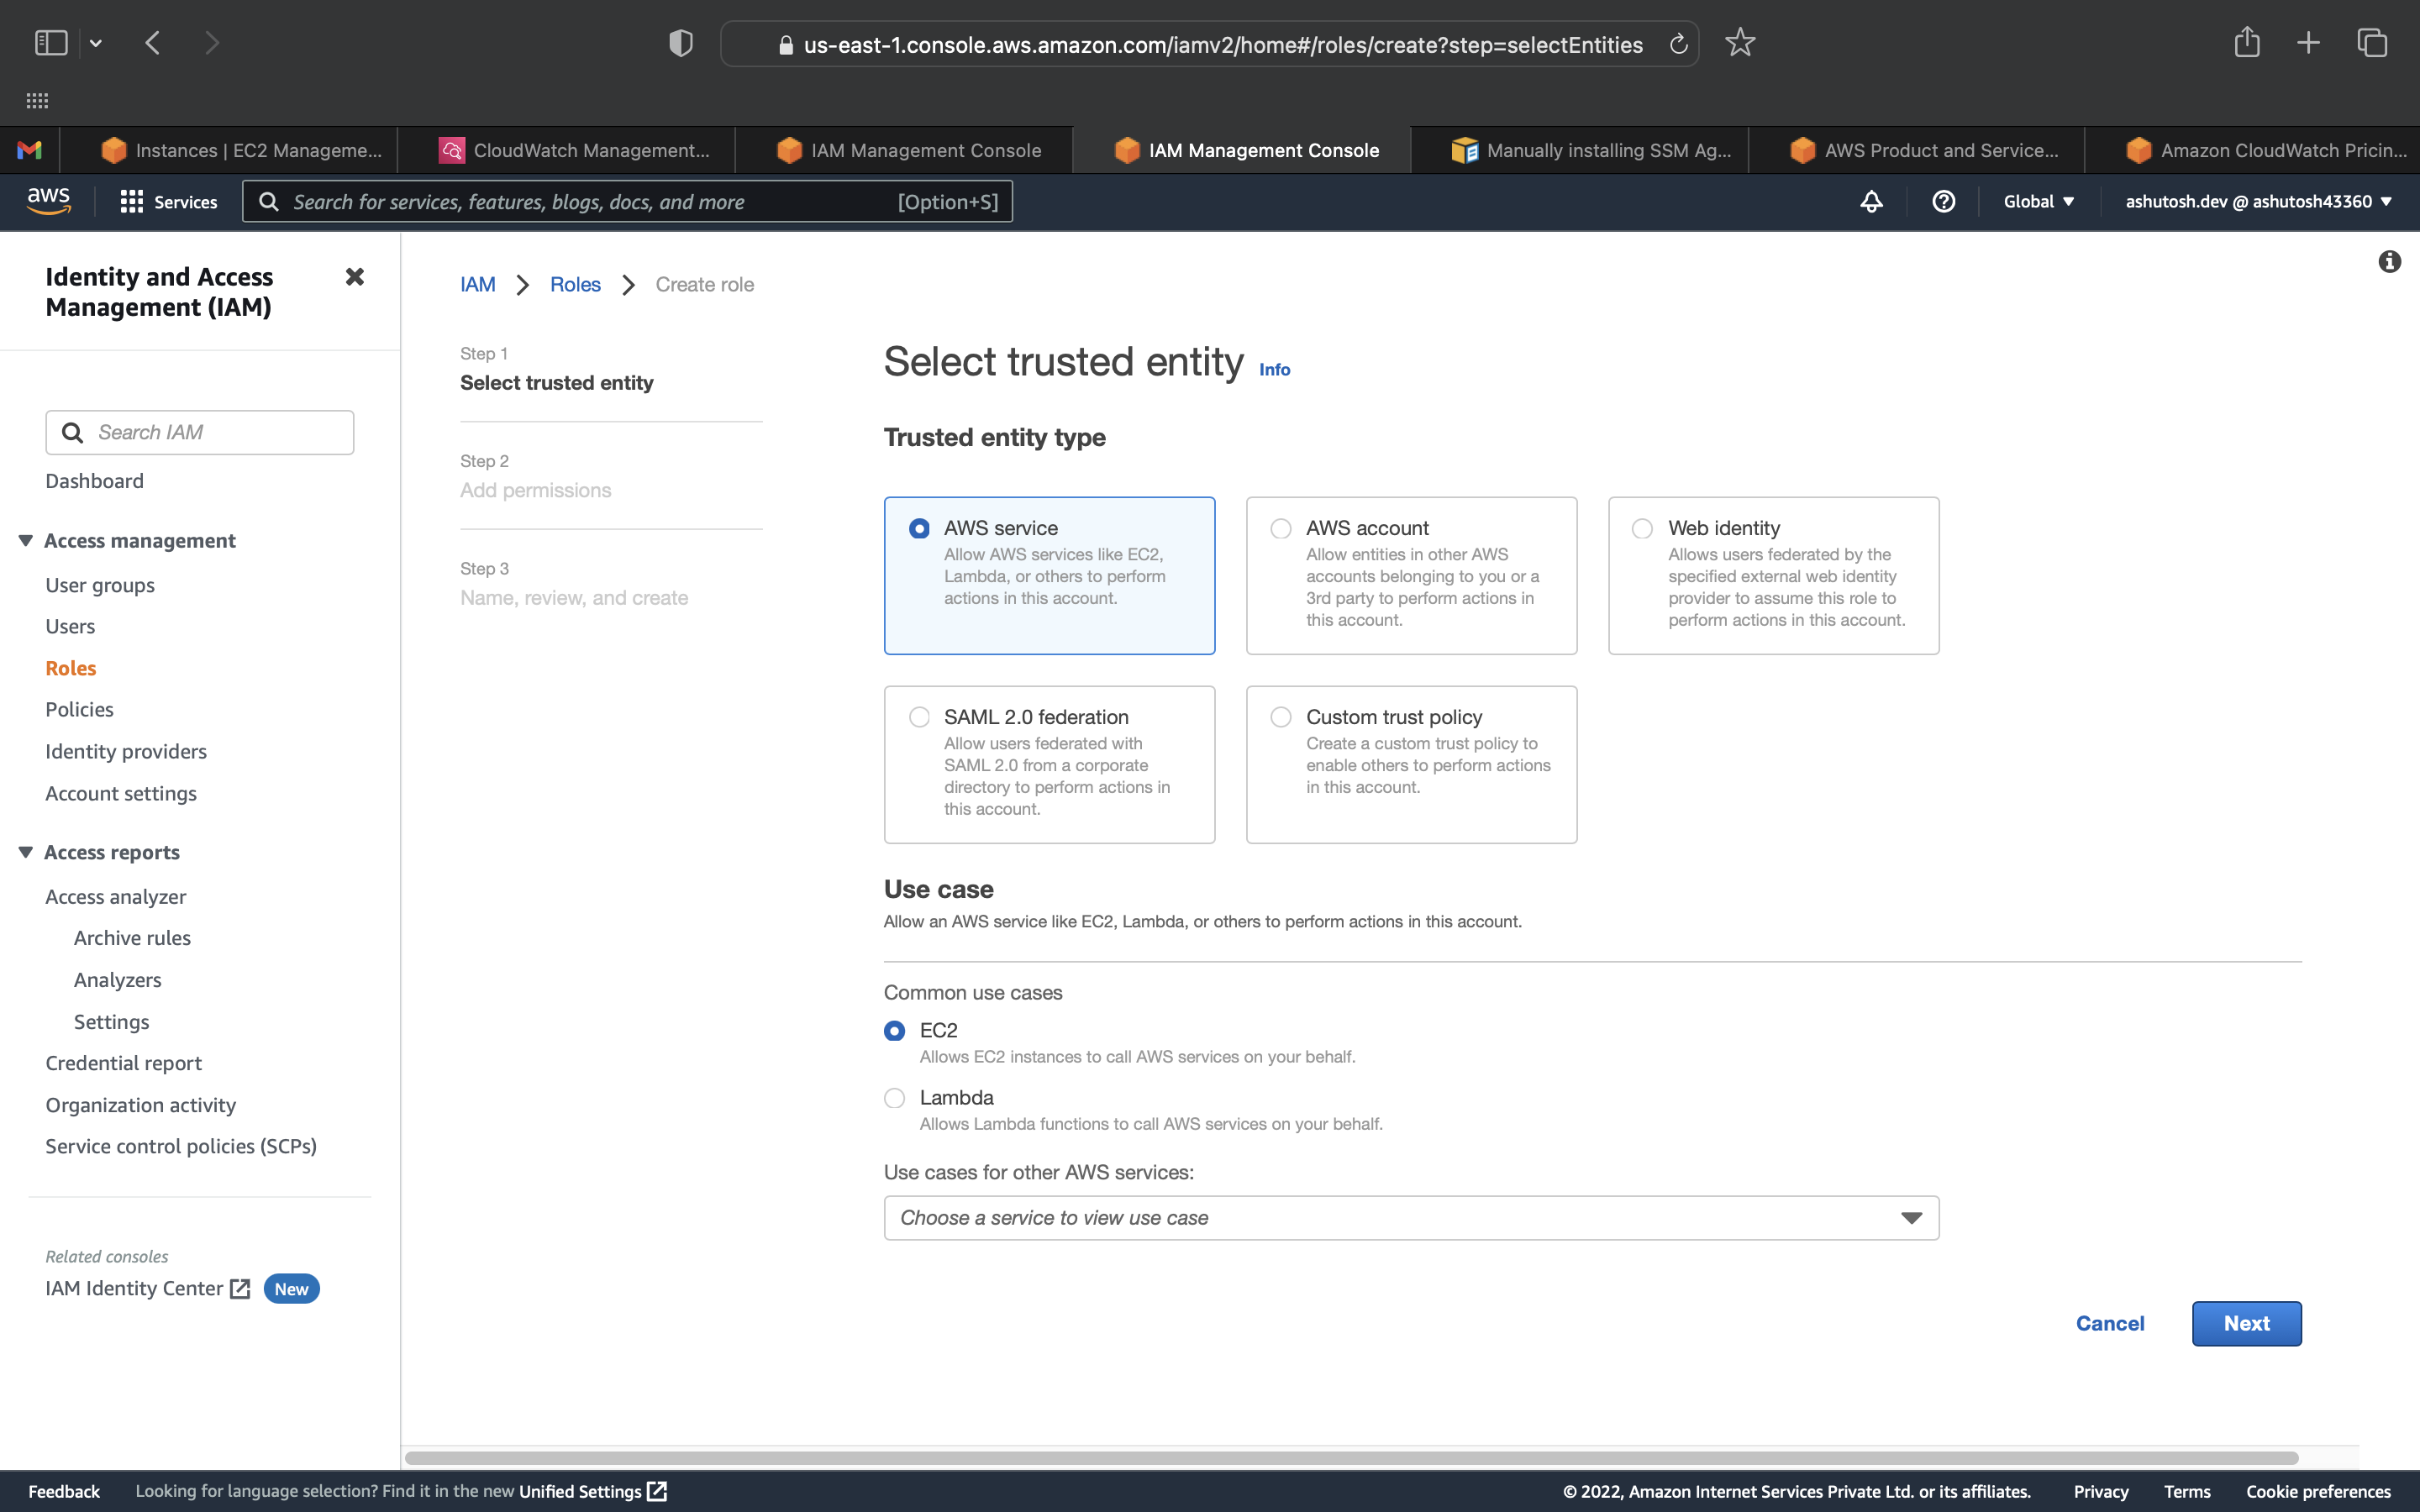
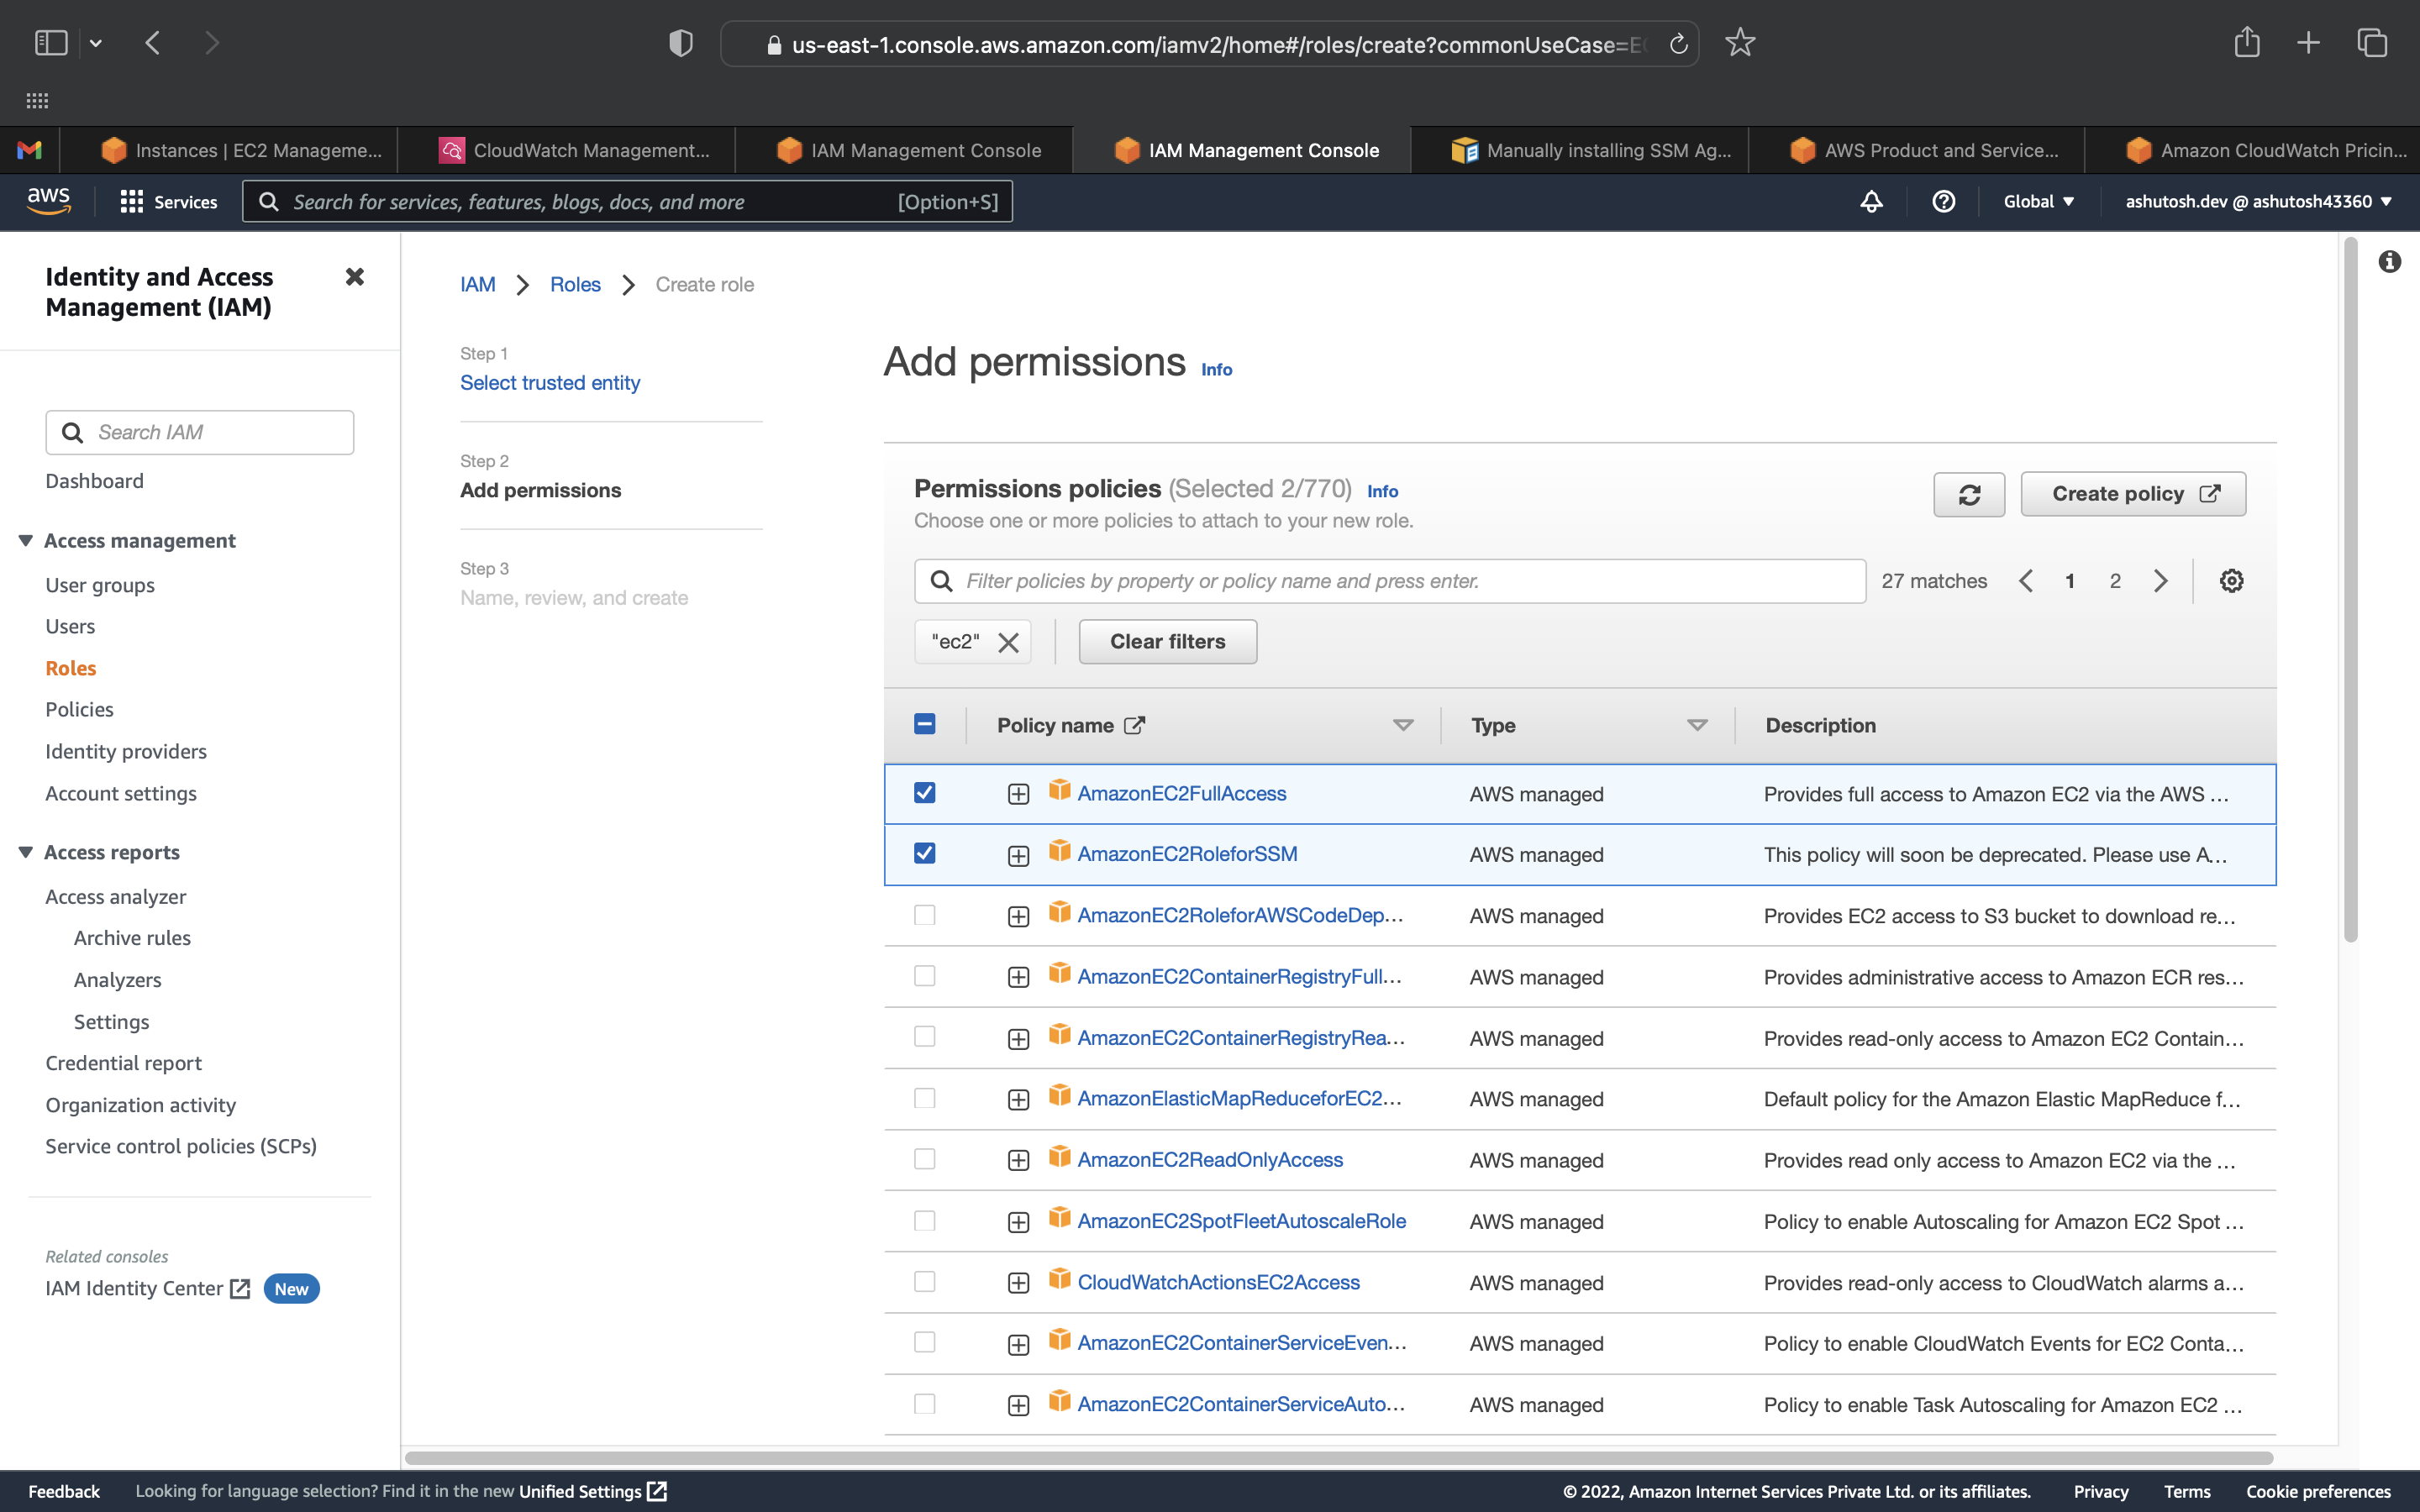
Add the permission. Here we are adding permission to send logs to CloudWatch. You can add more permissions as per your requirement.
Click on Next: In the next screen you'll be presented with a screen to enter a name and tags and then click on Next: Review.
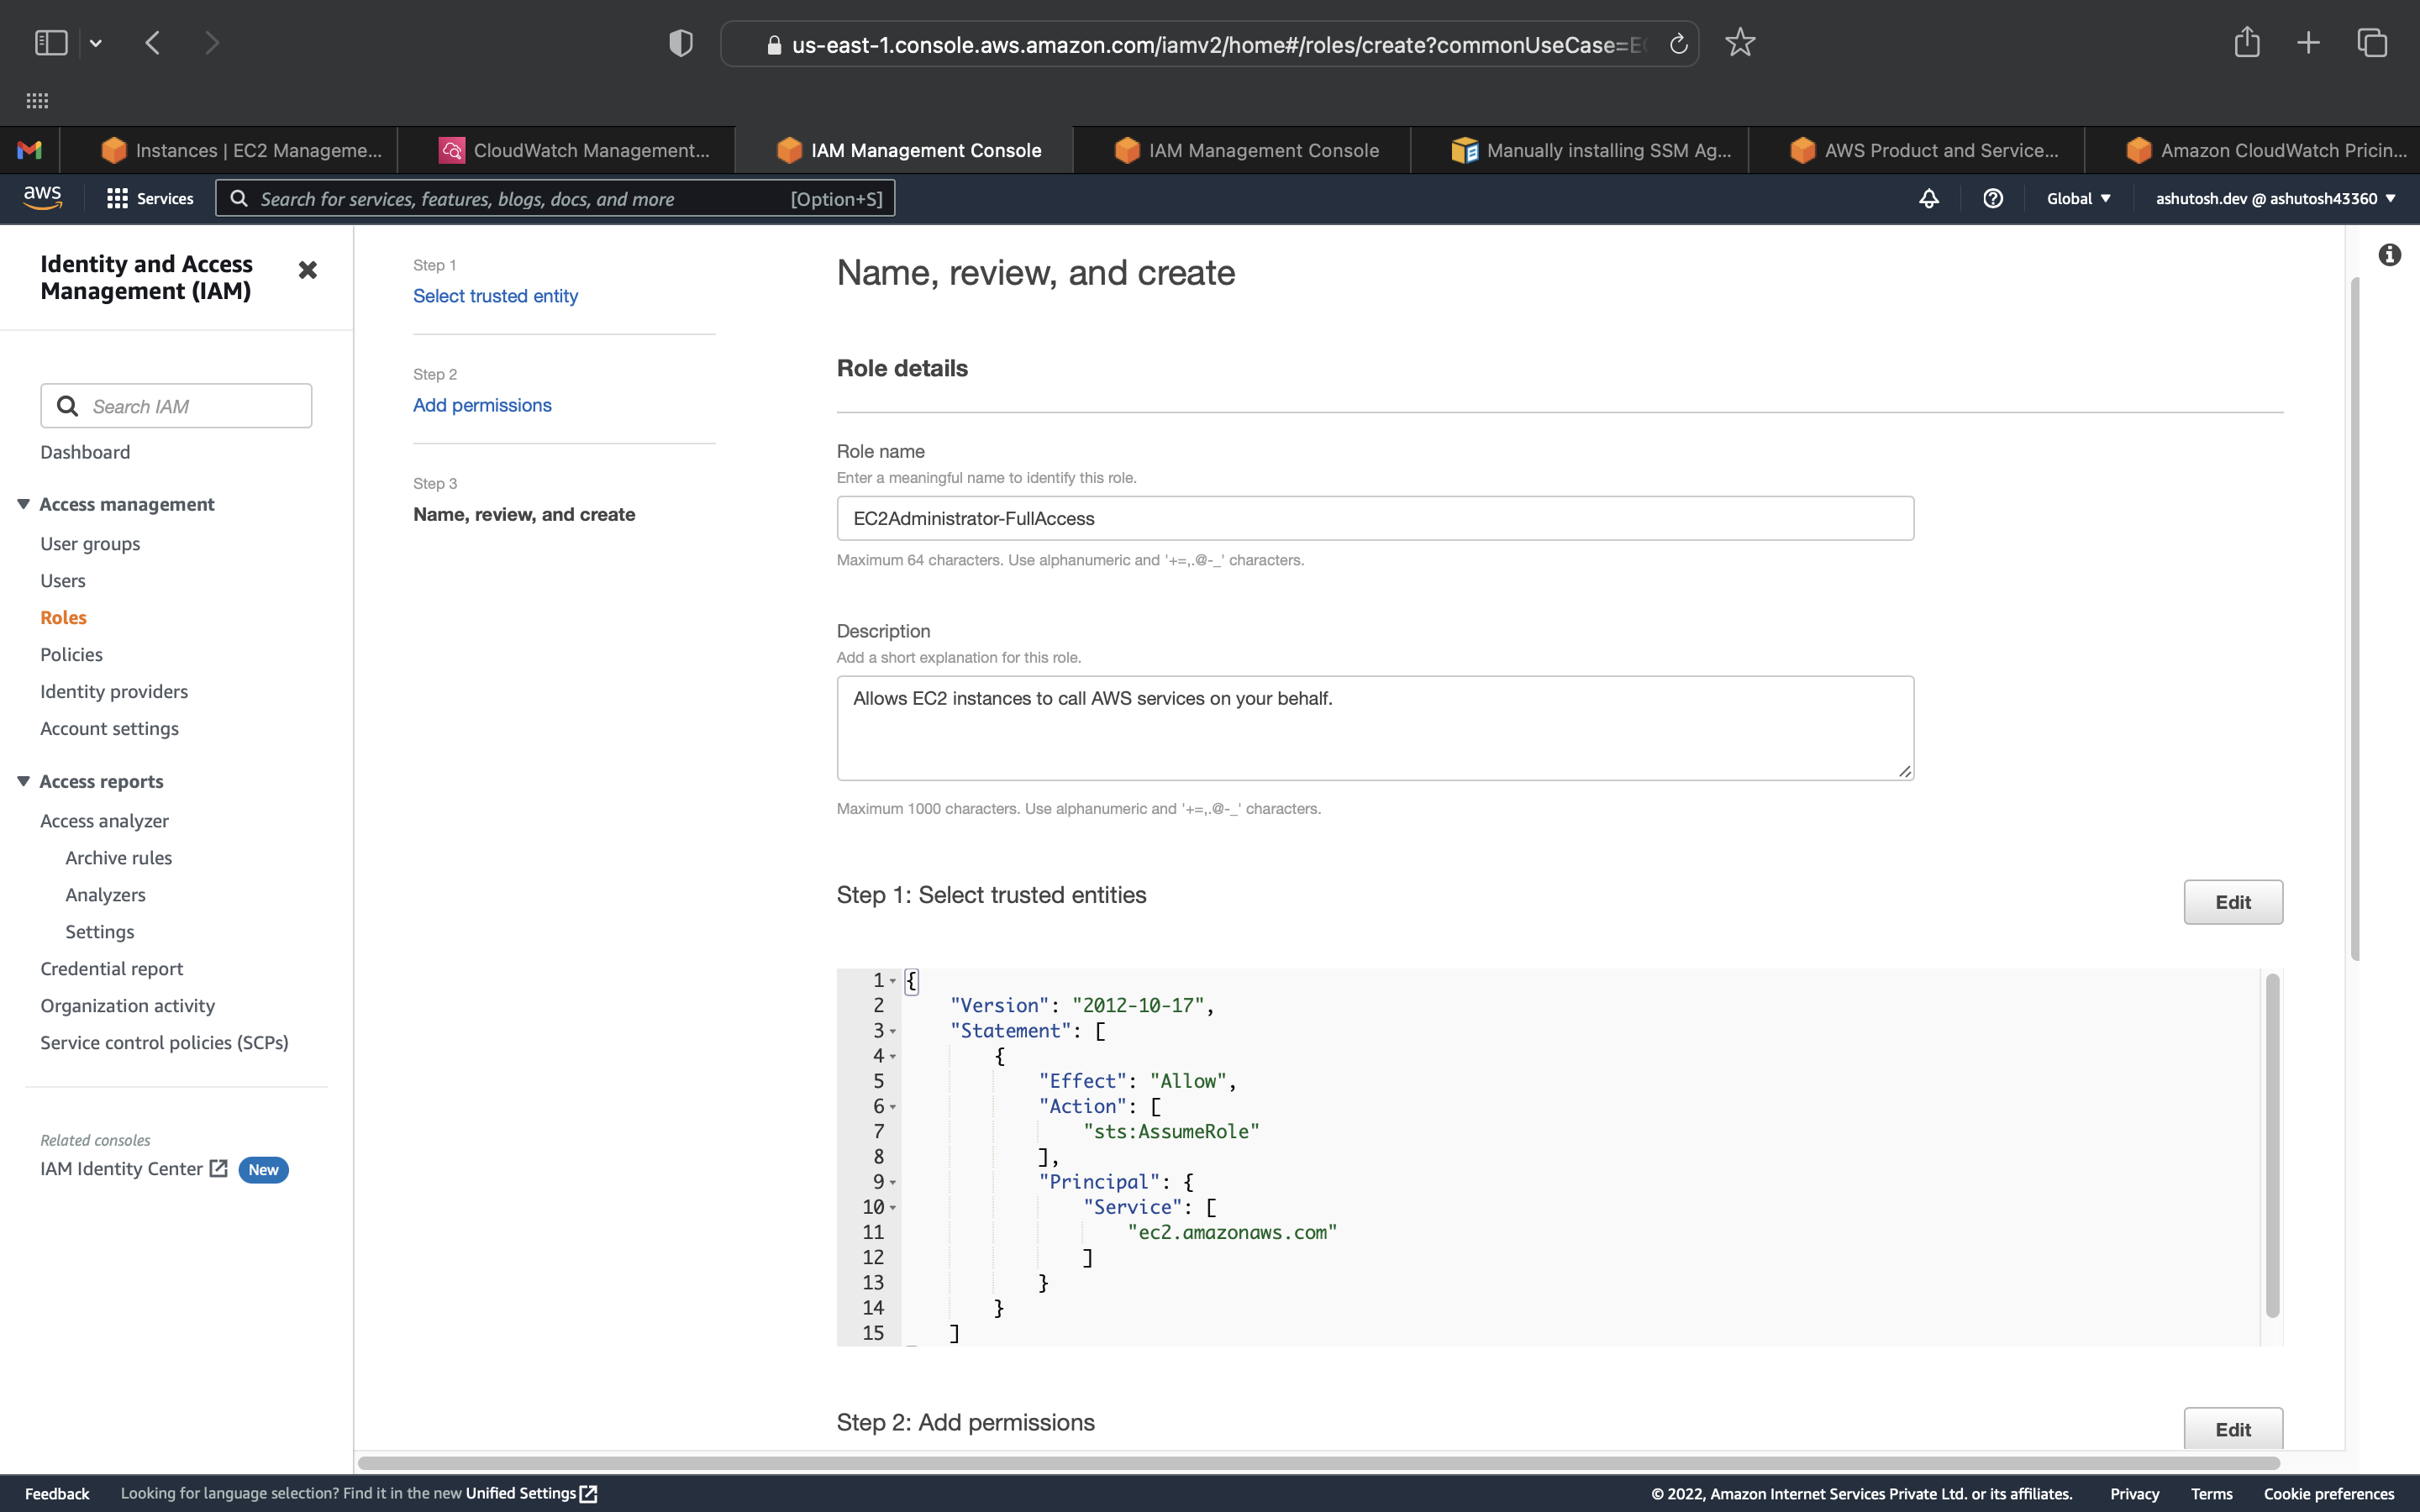
Click on Create Role.
It'll take you to the Roles page. You can see the role you just created. Click on the role name to see the details of the role.
Lunch EC2 Instance
Launch an EC2 instance with default options which should be fine for this demo. please make sure you add a key pair to the instance through which you can ssh into the instance.
After the EC2 instance is up and running, we need to attach it to the EC2 Instance, go to EC2 service and select the instance. Click on Actions. Select the Linux instance and click on Actions. Select security and click on Modify IAM role.
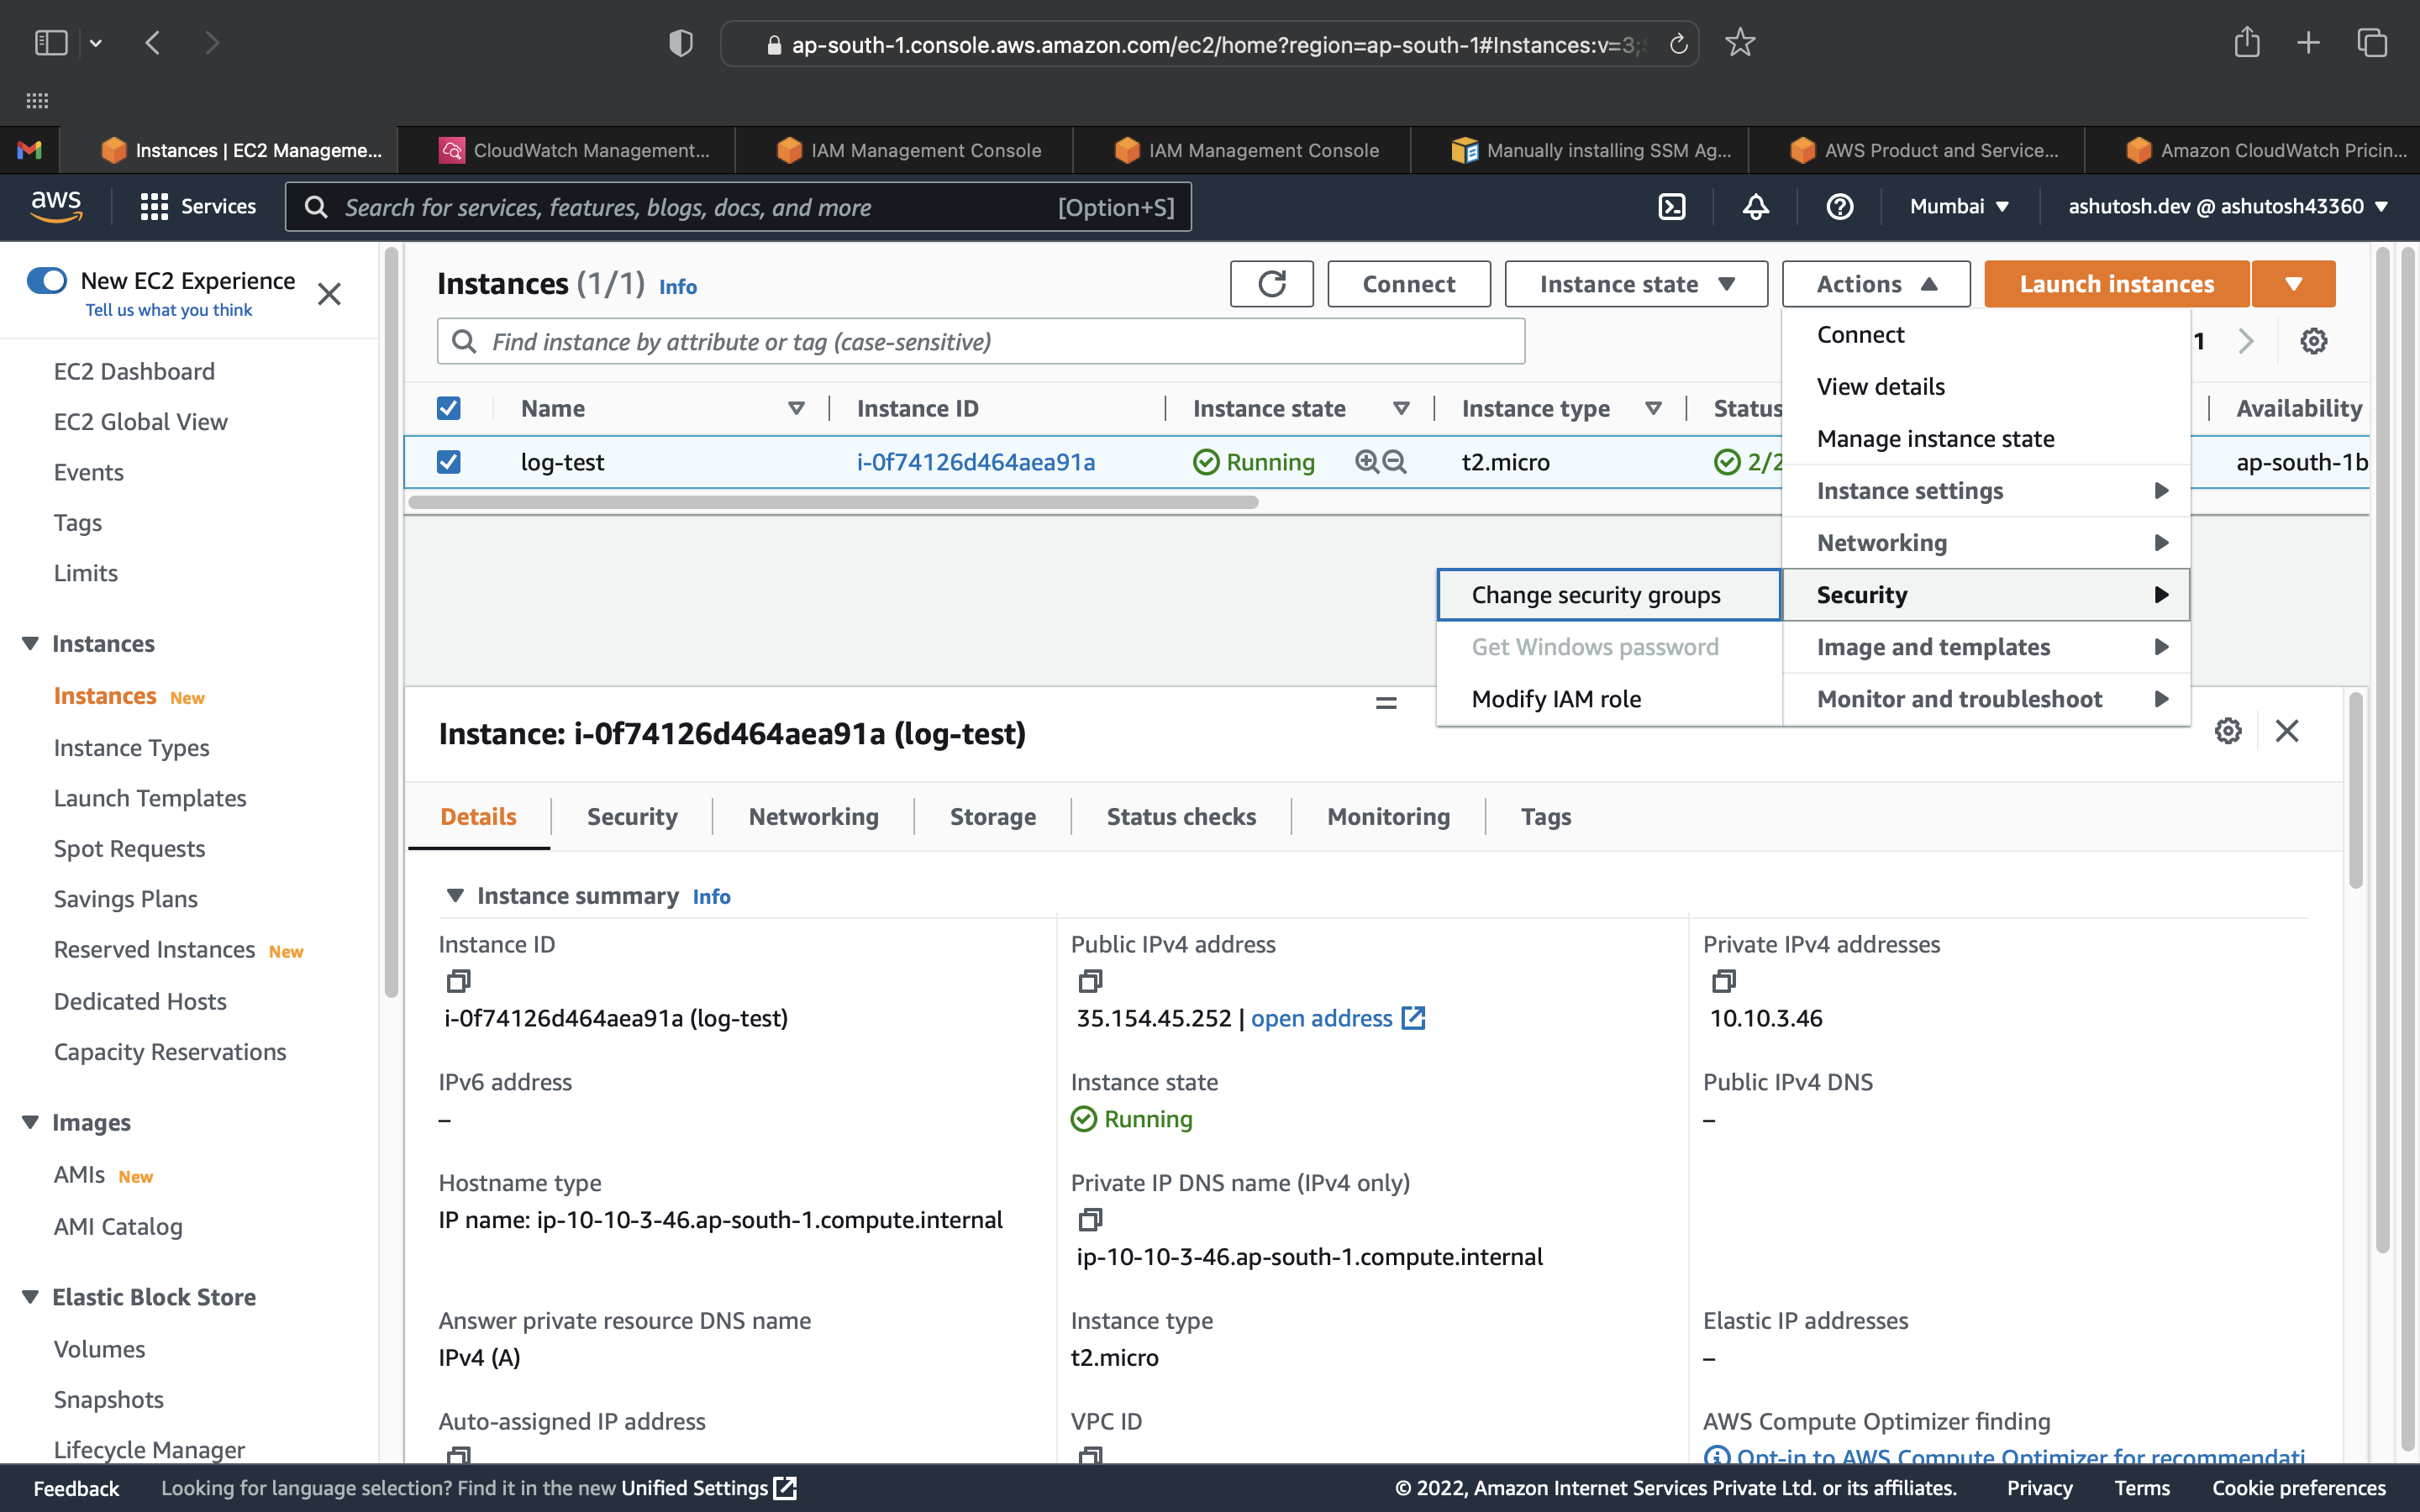
Select the IAM Role you just created from the dropdown and click on Apply.
Configure the Instance to send logs.
After attaching IAM Role to the Linux instance, install the CloudWatch agent on the Linux instance.
Login to the Linux instance and run the below command to install the CloudWatch agent.
sudo yum install -y awslogs
- Edit file
/etc/awslogs/awscli.confand change your AWS Region to the region in which instance is launched.
sudo vi /etc/awslogs/awscli.conf
[plugins]
cwlogs = cwlogs
[default]
region = ap-south-1
- For creating a custom
Log Groupand other customization Edit file/etc/awslogs/awslogs.conf.
sudo vi /etc/awslogs/awslogs.conf
- At the end of the file, add the following lines to configure the agent to send the logs to CloudWatch Logs.
  [/var/log/messages]
  datetime_format = %b %d %H:%M:%S
  file = /var/log/messages
  buffer_duration = 5000
  log_stream_name = {instance_id}
  initial_position = start_of_file
  log_group_name = EC2Logs
- Start and enable
awslogsdservice by typing the command.
sudo systemctl start awslogsd
sudo systemctl enable awslogsd
- To verify that the agent is running, type the following command. (optional)
sudo systemctl status awslogsd
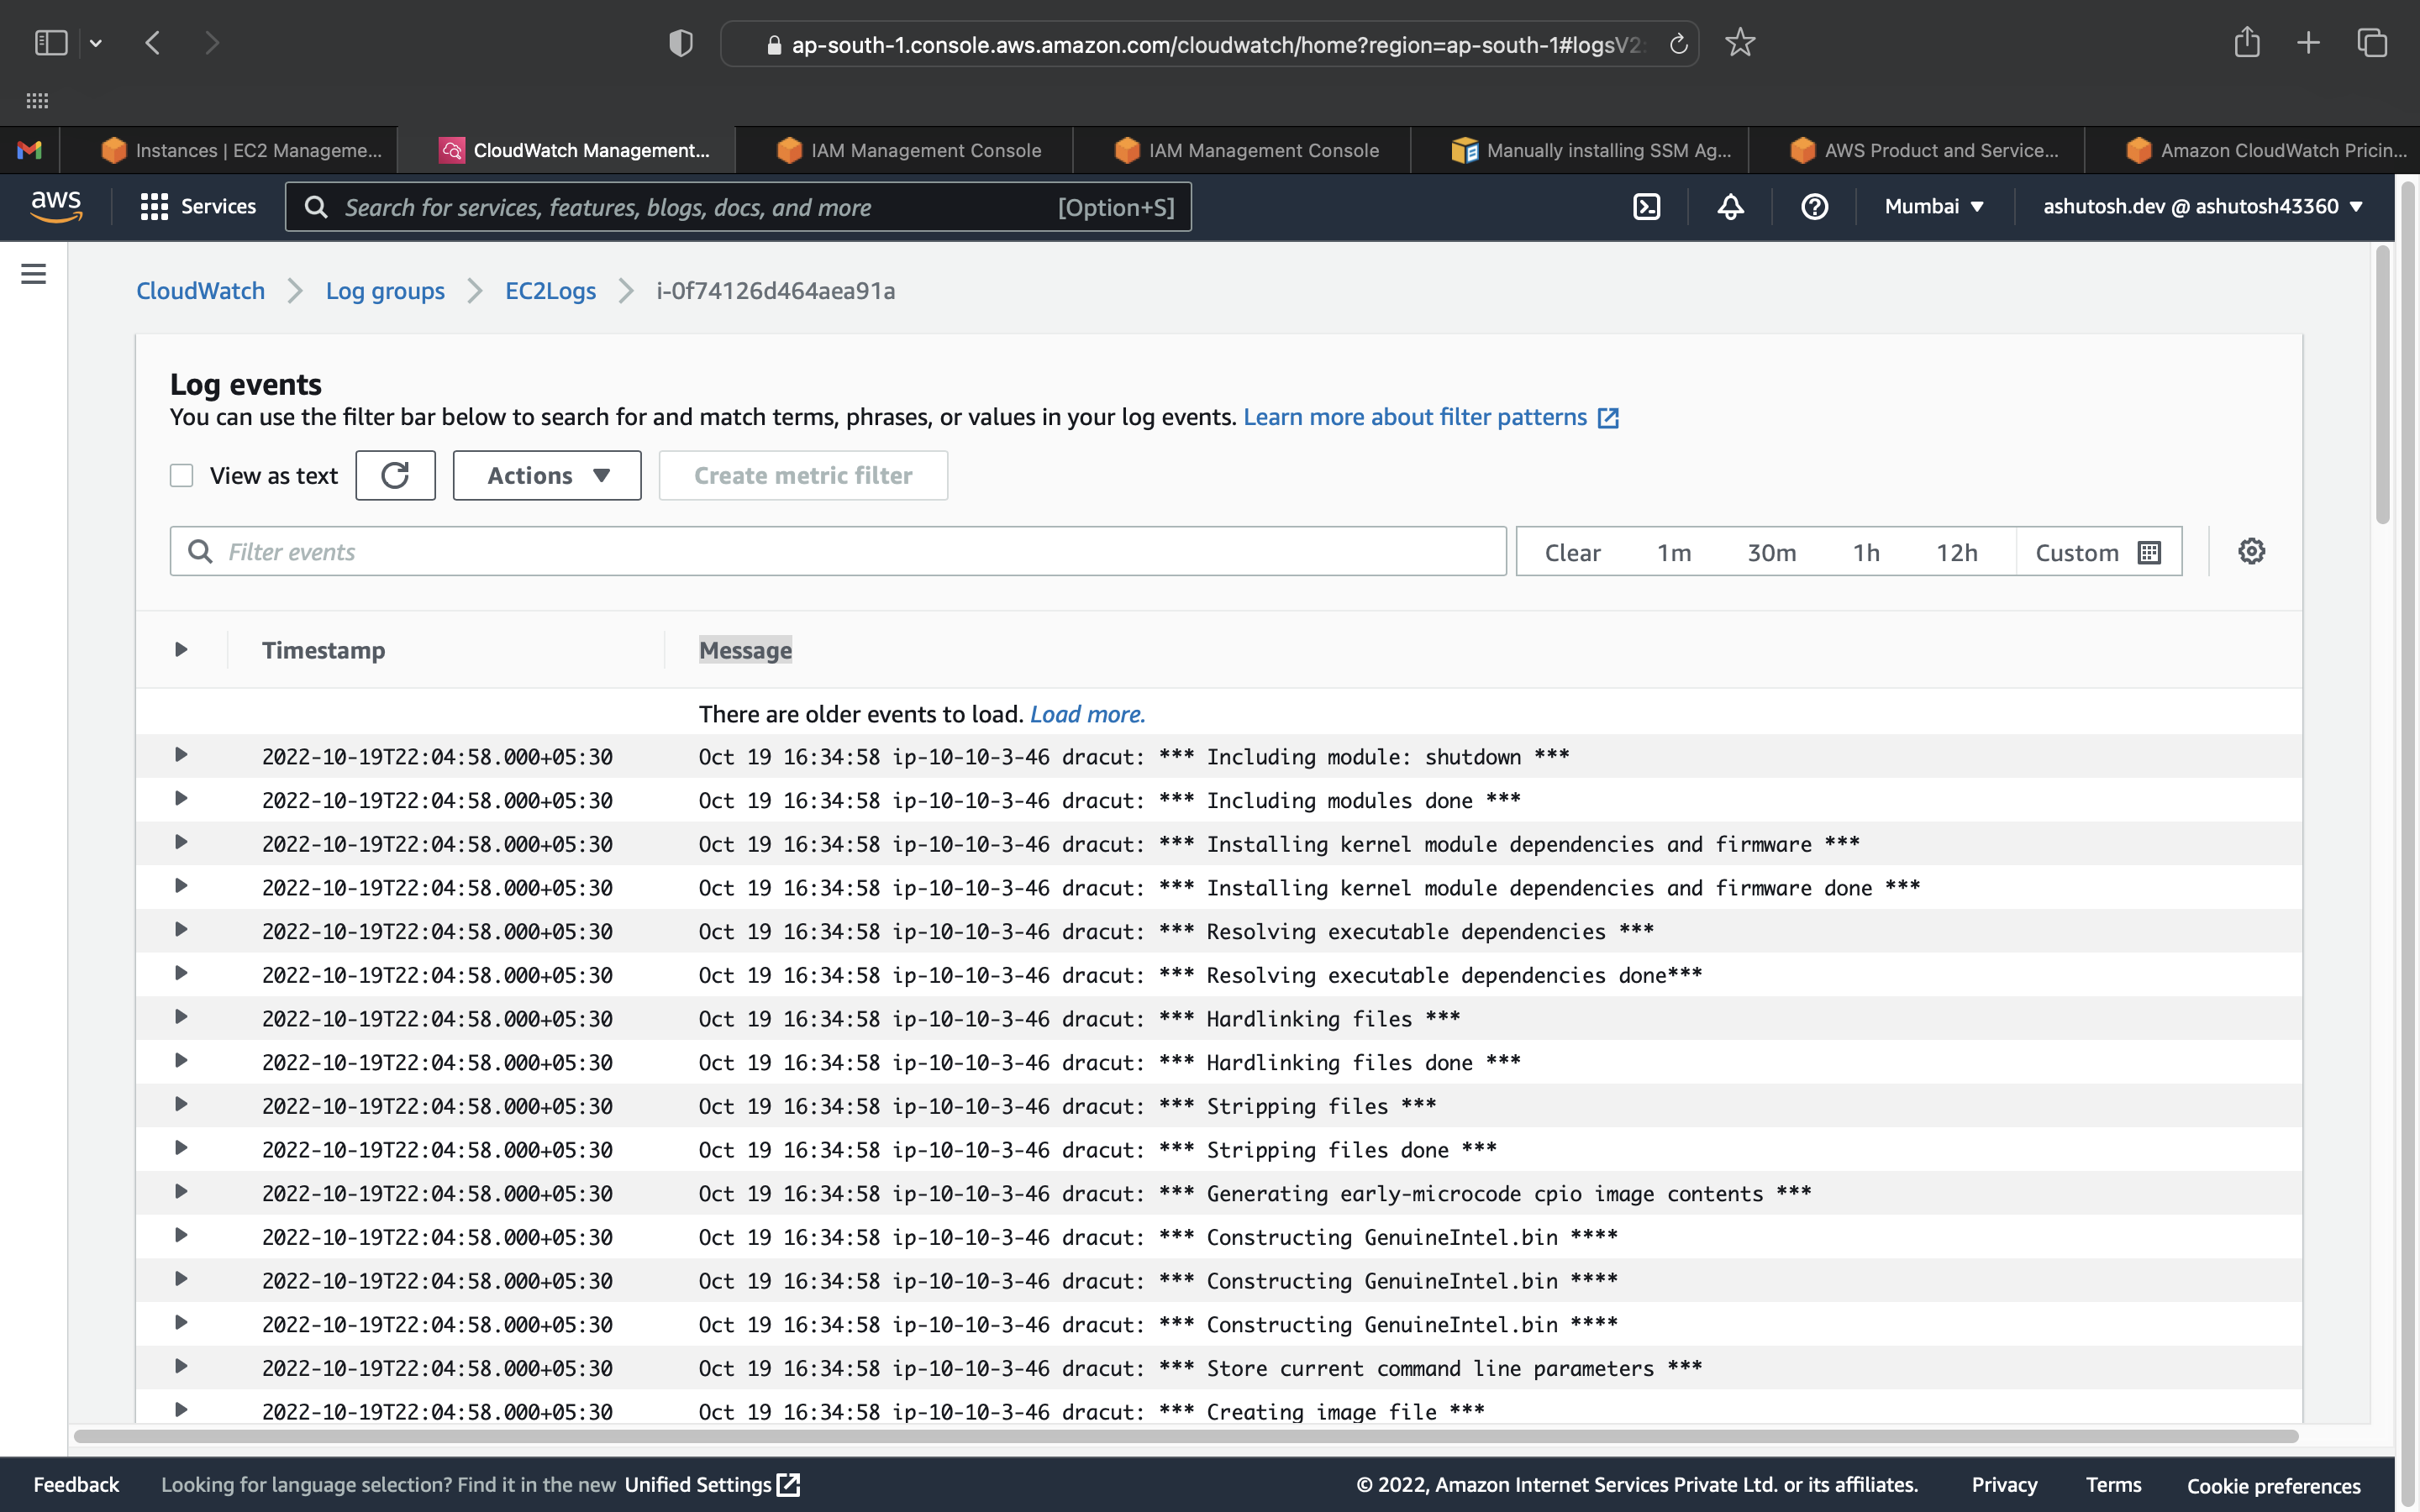
You should see the newly created log group and log stream in the CloudWatch console after the agent has been running for a few moments.
The Log Group name is EC2Logs and the Log Stream name is the instance ID of the EC2 instance.
If you're not sure and want to install the AWS SSM Agent while lunching
Add these lines to your user data
#!/bin/bash
sudo yum update -y
sudo yum install -y https://s3.amazonaws.com/ec2-downloads-windows/SSMAgent/latest/linux_amd64/amazon-ssm-agent.rpm


